Token Exchange
Warning
We only recommend using Token Exchange if you need to exchange tokens of logged in users from one application to another. If you just need to call a REST API using Client Credentials please go to API Access.
Token exchange allows your OIDC application to exchange a token it receives during a user's login, for a token that is accepted by a different OIDC application.
You may want to do this if, for example, you wish to call the Authorization Service API or another downstream service.
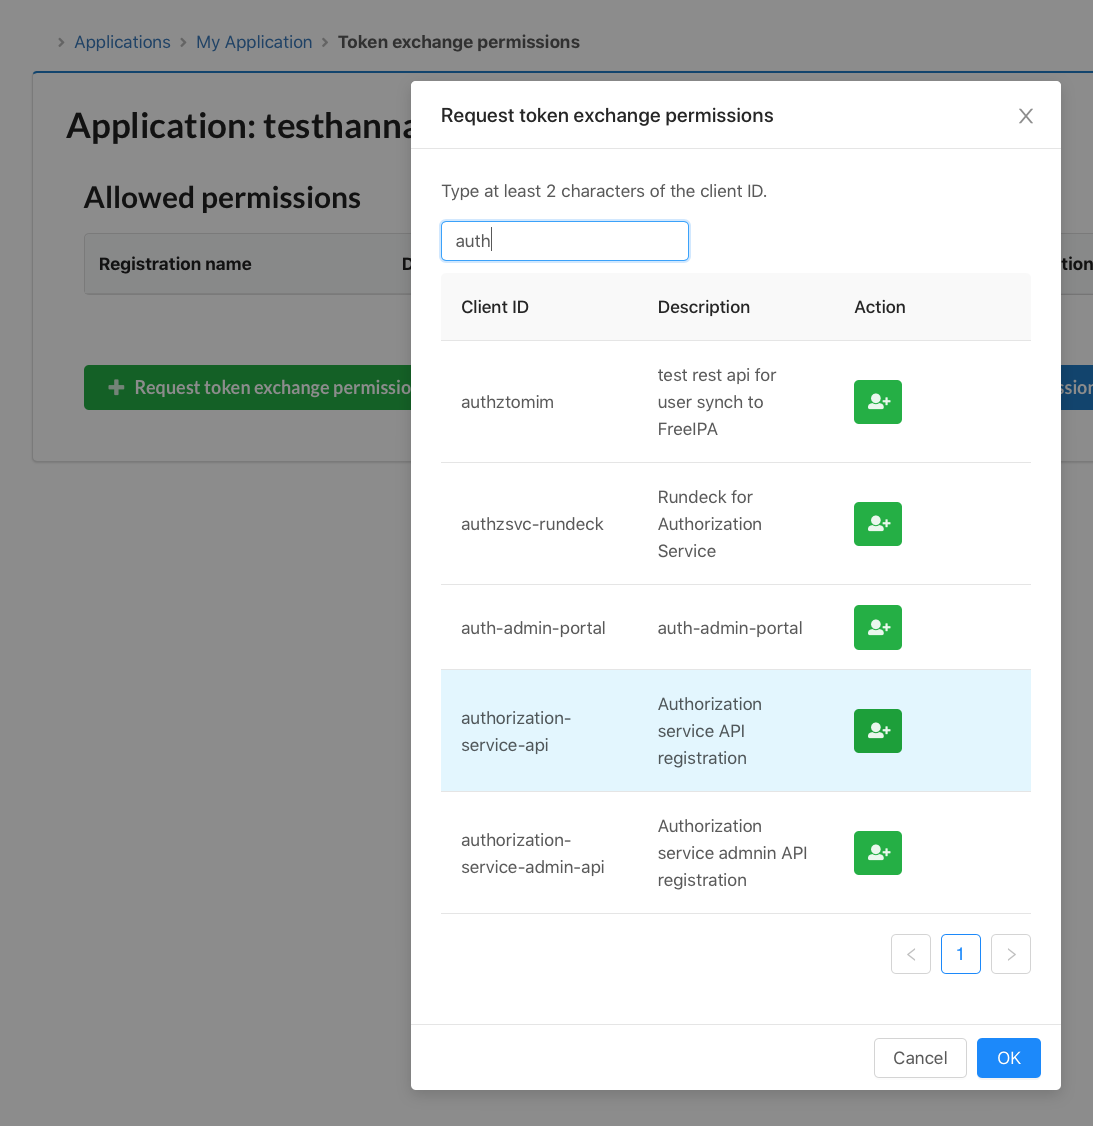
Request token exchange permissions
From the Application Portal, select Token Exchange for your OIDC registration.

Now, select "Request token exchange permission" and search for the target application. For example, the Authorization Service API.

Make the token exchange request to CERN SSO
Your application needs to make a second call to convert the original token into one that will be accepted by the target application.
curl -X POST \
    -d "client_id=starting-client" \
    -d "client_secret=SECRET" \
    --data-urlencode "grant_type=urn:ietf:params:oauth:grant-type:token-exchange" \
    -d "subject_token=...." \
    --data-urlencode "requested_token_type=urn:ietf:params:oauth:token-type:refresh_token" \
    -d "audience=target-client" \
    -d "scope=openid profile email" \
    https://auth.cern.ch/auth/realms/cern/protocol/openid-connect/token
The following fields must be specified:
| Field | Value |
|---|---|
| client_id | The clientId of your application |
| client_secret (optional) | The clientSecret of your application (not required for public clients) |
| subject_token | The access token that you received for your application |
| audience | The clientId of the target application |
| scope (optional) | The scope of the token |
| grant_type | urn:ietf:params:oauth:grant-type:token-exchange |
| requested_token_type | urn:ietf:params:oauth:token-type:refresh_token (which returns both Refresh and Access tokens), urn:ietf:params:oauth:token-type:access_token or urn:ietf:params:oauth:token-type:id_token |
More details can be found in the Keycloak Documentation.
Use the exchanged token
CERN SSO will return a JSON response containing an access token minted for the target application, along with a refresh token. More details can be found in the Keycloak Documentation.
Token exchange and Roles
After exchanging a token, the new token will contain the roles of the logged in Identity for the target Application. This prevents the source Application from defining its own roles for the target Application. The result is not always so intuitive, so let's view it with an example:
- We have an application front-end-app, which is a single-page application that needs to call some other API with user tokens: back-end-api. In order to do this it uses token exchange.
- The owner of front-end-app defines the roles
frontend_userandadministrator, and links them to some user. - The owner of back-end-api defines a role
backend_user, and links it to the same user. - The owner of back-end-api grants token exchange permissions to front-end-app.
Step 1: The user logs in into front-end-app and the application has the user token.
Now the token will contain the roles frontend_user and administrator.
Step 2: front-end-app exchanges the initial token with the target audience back-end-api
Now the token will only contain the role backend_user (but not frontend_user or administrator as before). You can see here that the owner of back-end-api had full control over the roles assigned to this user, so the developer of front-end-app cannot assign roles like administrator to any regular user.
Limitation: Chaining public clients
When a token is issued by Keycloak the azp (Authorized Party) is set to the client that initiated the flow. Public clients may only exchange tokens for which the azp is equal to their own client_id. For example:
Step 1: A user token is issued to public client_a. Resulting token:
{
  "iss": "https://auth.cern.ch/auth/realms/cern",
  "aud": "client_a",
  "sub": "mcurie",
  "typ": "Bearer",
  "azp": "client_a",
}
Step 2: Public client_a exchanges the token for audience client_b. Resulting token:
{
  "iss": "https://auth.cern.ch/auth/realms/cern",
  "aud": "client_b",
  "sub": "mcurie",
  "typ": "Bearer",
  "azp": "client_a",
}
Step 3: Public client_b exchanges the token for audience client_c. This step fails since the azp of the token presented is still equal to client_a. For it to work, client_b must provide a client_secret in its exchange request and therefore be a confidential rather than a public client. This would result in the following token:
{
  "iss": "https://auth.cern.ch/auth/realms/cern",
  "aud": "client_c",
  "sub": "mcurie",
  "typ": "Bearer",
  "azp": "client_b",
}